 Seed Starting Timeline (Zone 7a)
Your month-by-month guide from cozy indoor starts to thriving beds 🌿
In Zone 7a (hello, Jersey Shore friends! 👋), the gardening year is anchored by an average last spring frost in mid-April and an average first fall frost in early November. Use those bookends to plan your sowing. This guide gives you a clear, beginner-friendly timeline: what to start indoors, when to direct-sow outside, and how to pace your season.

Count Back from Your Last Frost (Mid-April)
Use the chart below to time indoor sowing and transplants. “LSF” = last spring frost.
| When | Start Indoors | Direct-Sow Outdoors | Notes |
|---|---|---|---|
1–12 wksbefore LSFlate Jan–early Feb |
Onions (seed), leeks, celery |
Long lead-time crops;bright light essential. |
|
8–10 wksbefore LSFmid–late Feb |
Broccoli, cabbage, cauliflower, kale, chardflowers: snapdragon |
Cool-season brassicas like a head start. |
|
6–8 wksbefore LSFlate Feb–early Mar |
Tomatoes, lettuce, parsley; flowers: marigold |
Peas, spinach, radisharugula if soil workable |
Sow peas outdoors once soil is ~40–45°F. |
4–6 wksbefore LSFmid–late Mar |
Peppers, eggplant, basil (warmth + grow lights) |
Carrots, beets, turnips, more spinach/lettuce |
Bottom heat (75–80°F) speeds pepper/eggplant germination. |
2–4 wksbefore LSFlate Mar–early Apr |
Cucumbers* (optional), summer squash* (optional), zinnias* |
Potatoes, scallions, cilantro, dill; succession radish/lettuce |
*Start in large cells; they dislike root disturbance. |
1 to 2 wks after LSFmid–late Apr |
Harden off 7–10 days prior |
Beans, corn once soil warms; direct cucumbers/squash |
Protect with row cover if nights dip below 50°F. |
2–4 wksafter LSFApr- May |
Melons, okra, sunflowers; second sowing of beans/corn |
Warm soil = faster germination and fewer setbacks. |
Month-by-Month Snapshot (Zone 7a)
Jan–Feb
Start onions/leeks/celery indoors. Inventory seeds, set up lights, test germination on older seed.
March
Start brassicas, tomatoes, and herbs indoors. Direct-sow peas, spinach, and radish when soil is workable.
April
Harden off transplants. After last frost, plant beans, corn, cucumbers, and squash. Protect on chilly nights.
May
Transplant tomatoes/peppers/eggplant. Direct-sow melons/okra/sunflowers. Mulch 2–3″ to conserve water.
June–July
Succession-sow beans, corn, cucumbers. Start fall brassicas indoors late July (6–8 wks before Sept transplant).
Aug–Sept
Transplant fall brassicas. Direct-sow carrots, beets, spinach for fall harvest. Start lettuce every 2 weeks.
Oct–Nov
Finish fall plantings early Oct. Add row covers for frost. Plant garlic late Oct–Nov for next summer harvest.
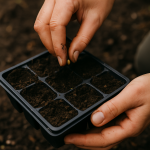
Hardening Off (The Week that Saves Your Season)
- 7–10 days before transplant, place seedlings outdoors in dappled shade for 2–3 hours; bring in at night.
- Increase sun and wind exposure daily; keep soil evenly moist.
- Transplant on a cloudy day or late afternoon; water deeply and mulch.
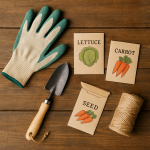
Quick Crop Guide (Zone 7a Favorites)
Crop |
Start Indoors |
Transplant/Direct-Sow |
Notes |
|---|---|---|---|
Tomato |
6–8 wksbefore LSF |
After LSF(soil 60°F+) |
Harden off;mulch; stake early. |
Pepper / Eggplant |
8–10 wksbefore LSFw/ heat mat |
1–2 wks after LSF(nights 55°F+) |
Love warmth;slow to start. |
Cucumber / Squash |
2–3 wksbefore LSF(optional) |
At/after LSF(or direct-sow) |
Use large cells;minimal rootdisturbance. |
Beans / orn |
Direct-sowafter LSF(warm soil) |
Succession every2–3 weeks. |
|
Lettuce / Greens |
4–6 wksbefore LSF |
Direct-sow 4–6 wksbefore LSF onward |
Bolt-prone in heat;partial shade helps. |
Carrot / Beet |
Direct-sow 4–6 wksbefore LSF |
Fine seed; keep surface evenly moist. |
|
Broccoli / Cabbage / Kale |
8–10 wks before LSF (spring) & late July (fall) |
Transplant 2–4 wks before LSF (spring) & Sept (fall) |
Row cover helps with pests. |
Herbs (Basil, Parsley, Dill) |
Basil 4–6 wks; Parsley 8–10 wks; Dill direct-sow |
Basil after LSF; Dill anytime cool; Parsley before/after LSF |
Basil loves heat; dill prefers cool shoulder seasons. |
Seed-Starting Basics (Success Boosters)
- Light: 14–16 hours/day under grow lights keeps seedlings sturdy.
- Heat: 70–75°F air; 75–80°F soil for peppers/eggplant.
- Airflow: A small fan reduces damping-off disease.
- Watering: Keep mix evenly moist; bottom-water when possible.
- Feeding: Start a half-strength fertilizer 2–3 weeks after germination.
- Potting up: Move into larger cells when roots fill starter cells.
Printable Mini-Checklist
- Find your exact frost dates; set LSF in mid-April, adjust locally.
- Count back weeks; schedule indoor sowing on your calendar.
- Harden off 7–10 days before transplanting.
- Mulch after planting and set up drip/soaker lines.
- Succession-sow greens and beans every 2–3 weeks for steady harvests.
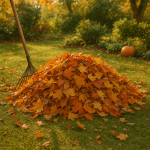
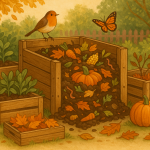
 Fall Bed Clean-Up:
What to Pull, What to Leave
Fall Bed Clean-Up:
What to Pull, What to Leave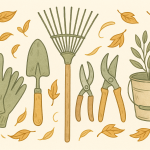


 Overwatering is the quiet culprit behind droopy leaves, root rot, and pest problems—yet underwatering can stress plants just as quickly. The secret isn’t watering more; it’s watering smarter:


