
Cabbage: The Cool-Weather Powerhouse
Why this humble leafy globe is a nutritional superstar and one of the happiest plants in a chilly garden.
Visit us at henchygardens.info · Shop the garden at henchygardens.printify.me
a frosty morning and still shows up bursting with life. While many warm-season crops are
packing up for the year, cabbage is just getting cozy, curling its leaves tighter and
tighter into that beautiful green globe we love to shred, roast, and tuck into soups.
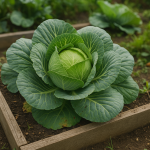
Cabbage is more than coleslaw and soup filler—it’s a true cold-weather superfood. It’s rich in vitamins, fiber, and protective plant compounds, yet budget-friendly and easy to grow, especially in raised beds where soil conditions can be tailored just right.
Why Cabbage Is So Good for You
Cabbage belongs to the brassica family (along with broccoli, kale, and Brussels
sprouts). These are some of the most studied vegetables in nutrition science because of
their powerful combination of vitamins, minerals, fiber, and unique sulfur compounds
called glucosinolates.
In a single cup of raw cabbage you’ll typically find:
- Vitamin C – for immune support and antioxidant protection.
- Vitamin K – important for blood clotting and bone health.
- Folate & B vitamins – support energy and cellular repair.
- Fiber – keeps digestion moving and helps feed good gut bacteria.
- Potassium – supports healthy blood pressure.
- Very few calories & carbs – making it friendly for weight management and many blood-sugar–conscious eating plans.

Health Benefits at a Glance
- Supports digestion & gut health
- Helps lower cholesterol
- Anti-inflammatory compounds
- Rich in antioxidants
- Supports heart & blood pressure
- May offer anti-cancer protection
- Low-calorie, high-satiety food
- Can be friendly for Type 2 diabetics*
Type 2 diabetic-conscious plate because it’s low in carbohydrates and high in fiber.
However, every body is unique—always check with a healthcare professional or registered
dietitian about how cabbage fits into your specific plan.
Cabbage Loves the Cold – Here’s Why
While tomatoes shiver and basil sulks, cabbage is out there humming happily in the cool air.
As a classic cool-season crop, cabbage actually prefers temperatures between
about 45–70°F (7–21°C). Light frosts can even sweeten the flavor as the plant
concentrates natural sugars in its leaves.
This makes cabbage a perfect choice for fall and early-winter gardening,
especially in raised beds. The beds warm up and drain better than in-ground plots, helping
roots stay comfortable even as the air gets nippy.

Growing Cabbage in a Raised Bed 
From seedling to supper
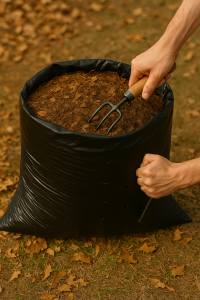
1. Soil & Bed Preparation
Cabbage likes a rich, well-drained soil with plenty of organic matter.
In Henchy Gardens, we think of the raised bed as a cozy quilt: layers of goodness that keep
roots happy and well-fed.
- Aim for a soil pH around 6.2–6.8.
- Mix in finished compost or aged manure before planting.
- Because cabbage is a “heavy feeder,” you can also add a balanced organic fertilizer or slow-release pellets at planting time.
2. Timing for Cool-Season Success
In many temperate areas, you’ll:
- Start seeds indoors in late summer for a fall crop, or
- Transplant nursery seedlings into the raised bed as late-summer heat breaks.
Once overnight temperatures drift down into the 50s and 40s°F (10–7°C), cabbage really finds its groove.
A row cover or light frost cloth can protect young plants from a surprise hard freeze while still letting the cold they love come through.
3. Spacing and Planting
Give each plant enough room to curl into a full head:
- Space plants about 12–18 inches (30–45 cm) apart in all directions.
- Plant seedlings a bit deeper than they were in their pots so stems are well-anchored.
- Water in deeply after planting to settle roots and remove air pockets.
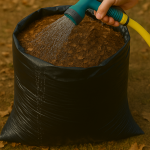
4. Water, Feeding & Mulch
Cabbage likes consistent moisture, especially as those heads are forming.
- Water deeply rather than with frequent sprinkles—about 1–1.5 inches (2.5–4 cm) of water per week, including rainfall.
- Top-dress with compost or a light feeding of organic fertilizer midway through the season.
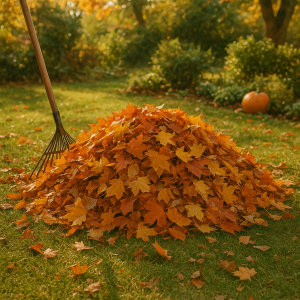
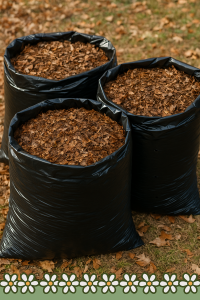
- Add a layer of straw, shredded leaves, or mulch to keep soil cool and retain moisture.
5. Pests & Protection (The Gentle Watch)
Cool weather greatly reduces pest pressure, but brassicas still have a few fans that love to snack:
- Cabbage worms & loopers: Hand-pick any you see, or use a row cover from the start to block cabbage moths.
- Slugs: Mulch carefully and use traps or copper barriers if they become a problem.
- Rotate crops: Don’t grow cabbage in the same bed year after year—rotate with non-brassicas to keep soil disease down.
6. Harvesting & Storing
Cabbage is ready to harvest when heads feel firm and solid when gently squeezed.
Use a sharp knife to cut the stem just above the outer leaves.
- Leave the outer leaves and base in the soil and sometimes smaller “side heads” will form.
- Store whole heads in a cool, humid place or the crisper drawer for several weeks.
- For longer storage, shred and ferment into sauerkraut or kimchi—your gut microbes will thank you.
Bringing It to the Table
Once your garden has gifted you a basket of dense, cold-kissed cabbages, the fun really begins.
Shred it into a crunchy salad with apple and carrot, braise it with onions and a splash of vinegar,
or roast thick wedges until the edges caramelize and turn sweet.
In the Henchy Gardens kitchen, we think of cabbage as a
“bridge vegetable”—it carries us from late summer into winter, keeping plates
colorful and nutrient-rich even as the days grow short. It’s affordable, adaptable, and forgiving
both in the soil and on the stove.


Looking for more tips?
- https://www.pinterest.com/HenchyFamilyFarms
- https://www.facebook.com/profile.php?id=61573707443744
- https://henchyfamilygardens.blogspot.com/
- https://www.instagram.com/henchygardens/
- https://www.youtube.com/@HenchyFamilyGarden
- henchygardens.com
- henchygardens.info
- www.tiktok.com/@henchygardens
- https://x.com/HenchyGradens
- https://www.threads.com/@henchygardens
- https://henchygardens.printify.me/
- www.linkedin.com/in/raquel-henchy-b95499392


 1. Maximizes Space